


What is drilling?
Drilling is a way of standardising pronunciation of a language item and developing fluidity (the ability to introduce language quickly and easily). The idea is for learners to develop good pronunciation habits by first listening to a model from the teacher, and then repeating this model several times while receiving positive and negative feedback for their efforts.
When should I drill?
It depends on what you’re drilling. If the language item is the target language for the lesson, for example a grammatical structure, then drilling is usually done after this has been elicited or presented. In a PPP lesson, for example, it is the very first practice stage – drilling in effect gives your learners extremely controlled practice of using the target language.
If the language you’re drilling is vocabulary, then you might do a quick drill as the word or expression comes up (for example while pre-teaching vocabulary for a reading activity or during a lead-in task) and then repeat it at the end of the lesson during a recap of new vocabulary.
How do I do drilling?
If your drill is a lesson stage in itself, as with very controlled practice of target language as we mentioned above, then here’s what you might do:
- You want this to be an energy-filled, enthusiastic activity. Get the class to stand up and maybe come to the front of the class in a tight semi-circle – change the dynamic somehow to lift the energy levels.
- Model the language item. You should try to be clear, enthusiastic and confident when you model – the objective of the activity is, after all, for learners to then repeat your model. If you mumble or they can’t hear you, it defeats the object. Say the model 3 times.
- Gesture to the class to repeat the model all together twice. This is called a chorus drill.
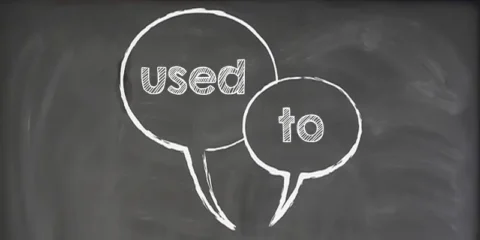
- Highlight. Here you want to model and drill the particular aspect of the language item that you want to concentrate on. You should be selective here – don’t try and highlight everything, instead focus on just one or two things. For example, if your target language is “used to” and you have modelled the sentence “I used to play tennis”, you might want to highlight the weak form of “to”. So you would model “…used to play…” (/juːstə pleɪ/). With tag questions you might highlight rising or falling intonation, and with the sentence “I’ve been to Paris” the highlight could be both the contraction “I’ve” and the pronunciation of “been” (/bɪn/).
There are different ways to draw learners’ attention to your highlight. For example to highlight intonation patterns you can demonstrate with your arm or use the whiteboard. For contractions, put two fingers together to show that two words have become one. For individual sounds you can compare two sounds with your voice or use the phonemic chart.
So, model the part of the language you want to highlight and then drill this with each student in turn. This is called an individual drill. Keep it fast-moving – move quickly from one student to the next to keep up the energy levels. If you need to re-model the highlight before each student repeats it, that’s fine.
Another useful technique here is back-chaining, where you start drilling from the end of a phrase and gradually build backwards (for example, “tennis” → “play tennis” → “to play tennis” → “used to play tennis”). This is particularly effective for helping learners master longer or more difficult utterances.
- Finally, drill the whole language item again, individually and then as a chorus. You can mix it up a bit here for variety and fun – just the boys then just the girls / shout and then whisper the model…
- Give suitable, enthusiastic praise and you’re done.
If you’re just drilling an individual word, for example while pre-teaching vocabulary, then the drill will be much quicker. There’s no need to stop the activity and change the dynamic of the class. Your drill could even be with just one student who has mis-pronounced a word. So, just model the word clearly a couple of times and have the student(s) repeat the model once or twice. Give suitable praise and then move on with whatever you were doing before.


1 comment
Mohanned Said
I use both of the chorus drill and the individual drill.
I try as much as I can to change the dynamic of the class and change the way I move.
We can let our students get the model pronunciation from an audio or a video they’ve already listened to.